Banana Pi / Pro 7″ TFT LCD Module Review
Installing the flex cable
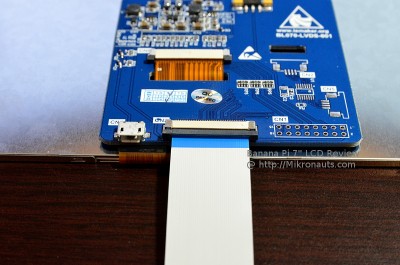
(click on image for larger version)
You have to be careful when installing the flex cable, but it really is not a big deal.
- Gently pull out the brown cable clamp at both ends
- Carefully push the FPC cable in, make sure it is straight and that the “silver” conductive fingers face down towards the PC board, and “blue” tape faces up.
- After the cable is fully in, push down on both sides of the cable clamp at the same time.
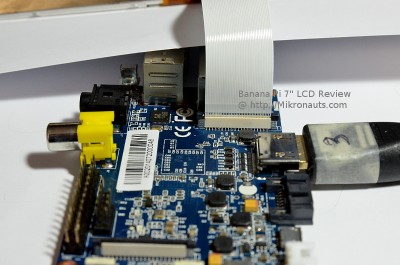
(click on image for larger version)
Installing the FPC cable on the Banana Pi is pretty much the same as installing it on the LCD module above.
- Gently pull out the brown cable clamp at both ends
- Carefully push the FPC cable in from the top, make sure it is straight and that the blue protective tape faces the Ethernet jack, and the “silver” conductive fingers face away from the jack.
- After the cable is fully in, push down on both sides of the cable clamp at the same time.
That’s pretty much all that is required for hardware installation!
If you would like a longer FPC cable, they are readily available in lengths up to 300mm on EBay, search for “FPC cable 40 0.5mm”
Unlike the 3.5″ display, you can’t mount the 7″ display onto your Banana Pi with handy stand-offs, so in this case, I grabbed two empty plastic parts drawers, and rested the LCD on them.
Installing the driver
Unlike the teething issues I had with the 3.5″ display, I had no problems whatsoever installing the driver for the 7″ display.
Here is how I got the 7″ display running (using an HDMI monitor with USB keyboard/mouse):
- open a terminal window
- git clone https://github.com/LeMaker/fex_configuration
- cd fex_configuration/
- sudo cp banana_pi_7lcd.bin /boot/bananapi/script.bin
- edit /etc/modules with your favorite editor (with sudo, ie “sudo vi /etc/modules”), uncomment ‘lcd’ (remove the ‘#’ in front of it)
- sudo reboot
If the above does not work for you, you may have to do
- sudo apt-get update
- sudo apt-get upgrade
Note that if you have ssh enabled, you can ssh in instead of opening a terminal window.
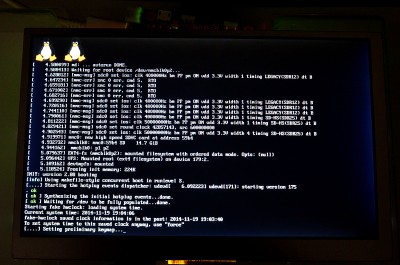
(click on image for larger version)
As you can see, once I rebooted, I saw my Banana Pi booting!
Slings and Arrows of Pre-Release Hardware
I knew the installation was too easy. Murphy just had to pay a visit…
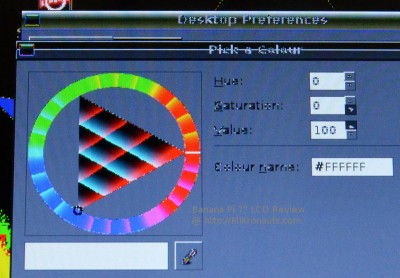
My BPi booted into the desktop just fine… but the colors were weird. It looked like the driver was interpreting the bitmap as an 8 bit palette mode – or something.
Please Note: Such minor issues are normal on prototypes, and are NOT present on production units. They do not reflect in any way on the quality of the product.
(click on image for larger version)
Fortunately a quick email to Tony, and he sent me not one – but two solutions!
Article Index


