Elf – 2WD Pi Robot
Installing & Using MJPEG-Streamer
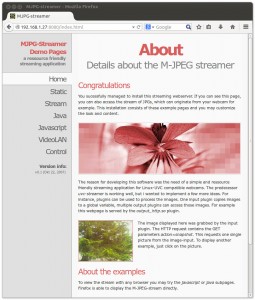
After some Googling, I found Miguel Greenberg’s blog with easy to follow MJPEG-Streamer installation instructions, which were easy to follow and worked immediately.
(Click on image for larger version)
I did make one change: I added a small 1MB ram disk and changed the shell script to stream from the ram disk instead of the SD card. This will greatly reduce the wear and tear on the SD card!
The Domoticz home automation system had easy to follow instructions for creating a small ram disk mounted as /var/tmp. Here are the changes needed to /etc/fstab:
sudo mkdir /var/tmp
sudo nano /etc/fstab
proc            /proc           proc    defaults          0       0
/dev/mmcblk0p5  /boot           vfat    defaults          0       2
/dev/mmcblk0p6  /               ext4    defaults,noatime  0       1
tmpfs		/var/tmp	tmpfs	nodev,nosuid,size=1M 0 0
add the last line shown above to /etc/fstab, and save the file.
After rebooting, you should see
tmpfs 1024 4 1020 1% /var/tmp
after doing a ‘df’ command.
Ok, now that we have a small 1MB ram disk that we can place the temporary jpeg images made by MJPEG-Streamer on, we need to create a “stream.sh” shell script that we can use to easily start streaming whatever Elf sees:
nano stream.sh
#!/bin/sh
mkdir /var/tmp/stream
raspistill --nopreview -vf -hf -w 640 -h 480 -q 5 -o /var/tmp/stream/pic.jpg -tl
 200 -t 9999999 -th 0:0:0 >/dev/null 2>/dev/null &
LD_LIBRARY_PATH=/usr/local/lib mjpg_streamer -i "input_file.so -f /var/tmp/strea
m -n pic.jpg" -o "output_http.so -w /usr/local/www"
After entering the lines above, a simple
chmod +x stream.sh
will start Elf streaming!
For now, I ssh into Elf, and start streaming manually, however Elf can start streaming on his own simply by adding
/home/pi/stream.sh
to /etc/rc.local
in which case Elf will start streaming as part of booting!
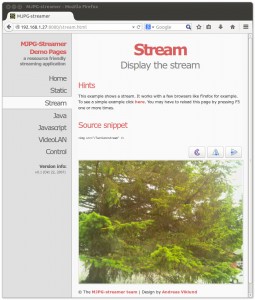
Here is Elf looking out a window streaming the movement of the branches of a large tree:
(Click on image for larger version)
The MJPG-Streamer demo pages let you try out various modes of streaming
- a static capture
- streaming mjpeg in a web page
- streaming using Java
- streaming using JavaScript
- streaming using VideoLAN
- the Control tab does not do anything on my system
The good news:
- MJPG-Streamer is a really easy way to stream video from your Raspberry Pi.
The Bad news:
- The frame rate is very low, roughly 2fps on Elf running on a stock Raspberry Pi Model B
Now that I have Elf streaming video at a low frame rate, I need to get h.264 video streaming at a higher frame rate.
I am hoping to get 720p at 20-30fps over WiFi for a POV look out Elf’s eye.

