HexPi – Hexapod Pi Robot
April 14, 2014
I’ve started working on the software for the “Better Mousetrap Servo Tester” 🙂
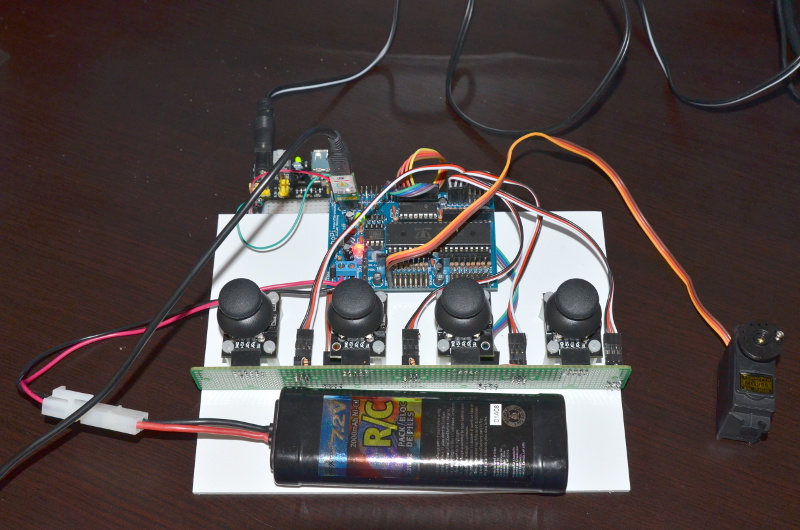
(Current State of the “Better MouseTrap Servo Tester” – click on the image to see a larger photo)
All joysticks are reading properly, however I have to add pull up resistors to the output of the switches.
After that, I’ll write an auto-calibrate routine, and map the joystick ranges to 500us – 2500us servo signals. For better control, I’ll leave a dead-zone around the 1500us centre point.
I forgot to charge my RC battery packs yesterday (which was family time); so it will take another 4.5h before I can drive the high power servos on HexPi from my servo tester.
Until the batteries are charged, I’ll just hook up some micro servos so I don’t have to wait that long 🙂
Update #1:
Work interfered, so I did not have time to finish the software or try micro servos. But I got back to HexPi & servo tester a short while ago, and:
I added 10k pull up resistors for the thumbstick buttons, and they work fine 🙂
Carefully examining the joystick’s pcb, there appears to be a place for a surface mount resistor to pull up the normally open switch to +5V. I guess they decided to save the $0.01 cost of the resistor on this production run. Sheesh.
One of my RC batteries finished charging, and I was able to find my stash of RC battery power connectors. I made a cable, and as soon as I finish the calibration routine, and simple scaling, I am ready to start calibrating HexPi’s legs with my “Better Mousetrap” prototype servo tester!
Update #2:
The joystick calibration works!
I’ll have to save the calibration values to the eeprom, right now I have to re-calibrate the joysticks every time I start up the tester firmware 🙂
Time to hook up some servos…
Update #3:
Kentucky Fried Servo!!!
I tried my new servo tester on one of the batch of TowerPro MG995’s I bought for HexPi.
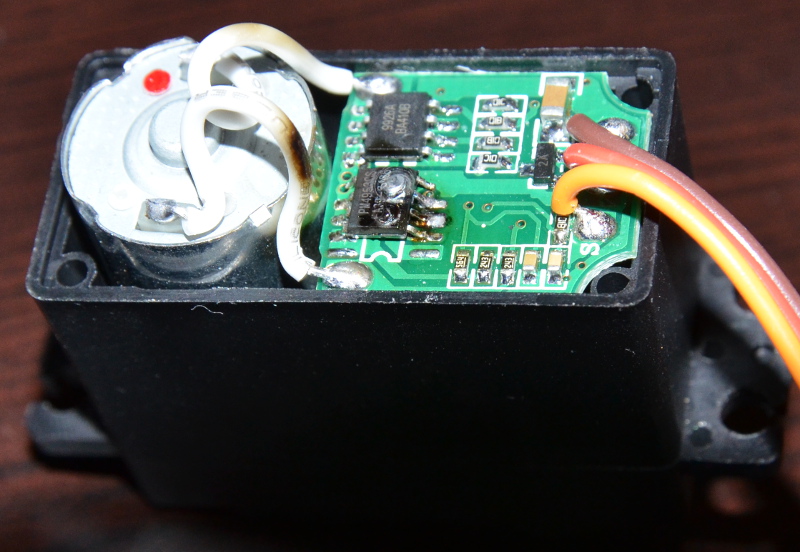
(Kentucky Fried Servo – click on the image to see a larger photo)
THE BLUE SMOKE ESCAPED!!!
And boy was it acting weird…
After quickly powering off my RoboPi, and disconnecting the battery pack, I took the servo apart.
Imagine my surprise when I saw that one of the soic-8 packages had bubbles of plastic, and one of the power leads to the motor was also blackened!
Looking closely at the board showed that the 8 pin soic package was installed incorrectly, one row down, leaving two empty soic pads, and two legs of the ic sitting on nothing.
The servo could not have been tested at the factory – this fault would have been caught by testing!
Talk about lack of quality control!
I’ll have to test every servo in the batch before using them, heck, I am tempted to take the back of each one to verify there are no more incorrectly installed h-bridge chips.
[Navigate the pages in this article by clicking on the numbers below]

